Managing Zones
This information is from Audio Enhancement's EPIC 2.5 Admin Manual.
Zones in the system refer to objects that contain one or more rooms A zone is a group of rooms or areas to which a bell can be played These are critical objects in the system They can contain as few or as many devices as is necessary and a device can belong to one or multiple zones
Examples of zones include:
• Entire School: Containing all rooms and common areas, outside included
• Inside: Containing all devices inside the school (no outside speakers)
• Classrooms: Containing all the classrooms only
• Vocational: Containing the Art and Shops classes
• “Fifth Grade Testing”: Containing all fifth-grade testing classrooms
Add Zone
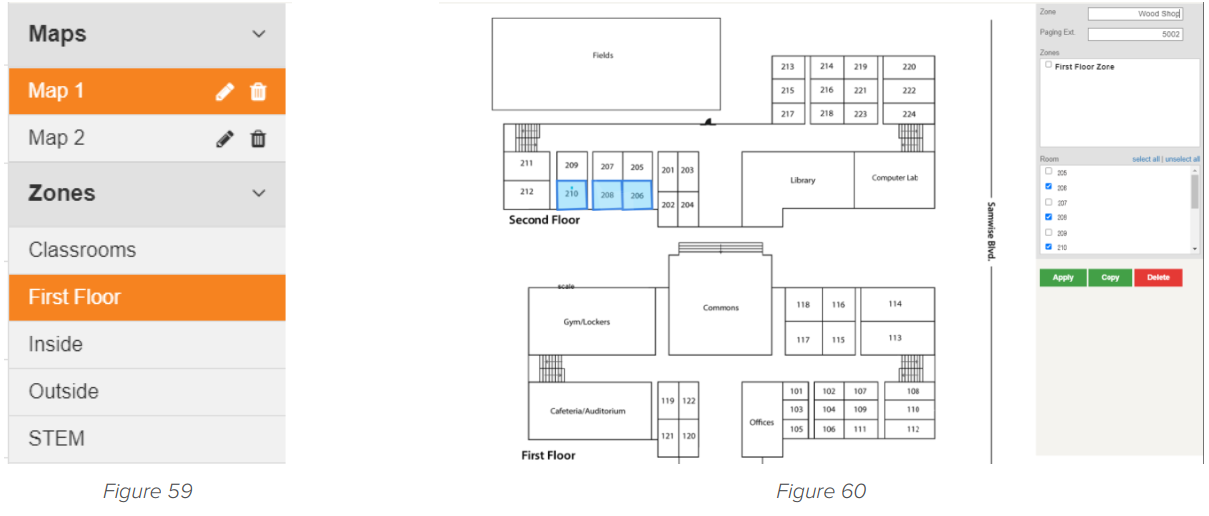
1. To add a Zone, go to Map Setup and click the map then Add Zone. The Zone Information Panel
will pop up on the right (Figure 58)
2. Name the Zone When paging to a zone, a paging extension is automatically added This is used
to page that zone from a VoIP phone If the zone extension already exists, it will display an error
3. Simply Check Mark the rooms that should be a part of that zone or click them on the map The
rooms in that zone will be highlighted in blue to visually verify that the correct rooms are a part
of the zone
4. Click Apply to save An existing zone can also be nested into the new zone

Edit Zone
1. To edit a zone, go to Map Setup and expand Zones
2. Select the zone that needs to be edited and the panel will pop up (Figure 59)
3. Clicking rooms allows you to select or deselect them, enabling you to add or remove them
from the zone
4. Click Apply
If needed Zones can be removed by clicking Delete (Figure 60)
This information is from Audio Enhancement's EPIC 2.5 Admin Manual.