Adjusting MS Device Volumes
Portions of this article were sourced from Audio Enhancement's EPIC 2.5 Admin Manual
There are several ways to adjust volumes depending on what type of output, room, or area you are trying to adjust.
Let's start with a simple classroom, and your issue or teach complaint is that when the secretary is making announcements, the volume is too low, and she cannot hear the announcement in her room. After talking to other teachers in this school building you find that a majority of them have the same complaint.
Configure All Devices
Let's start by configuring all the devices at a higher volume level. In the picture below is the menu you will want to get to by logging into EPIC, clicking Settings on the left side, the Blue Configure button, then finally select the tab for the type of devices you have. (MS500, MS500a, MS700, MS320, MS375) - MS600 is considered a MS500a.
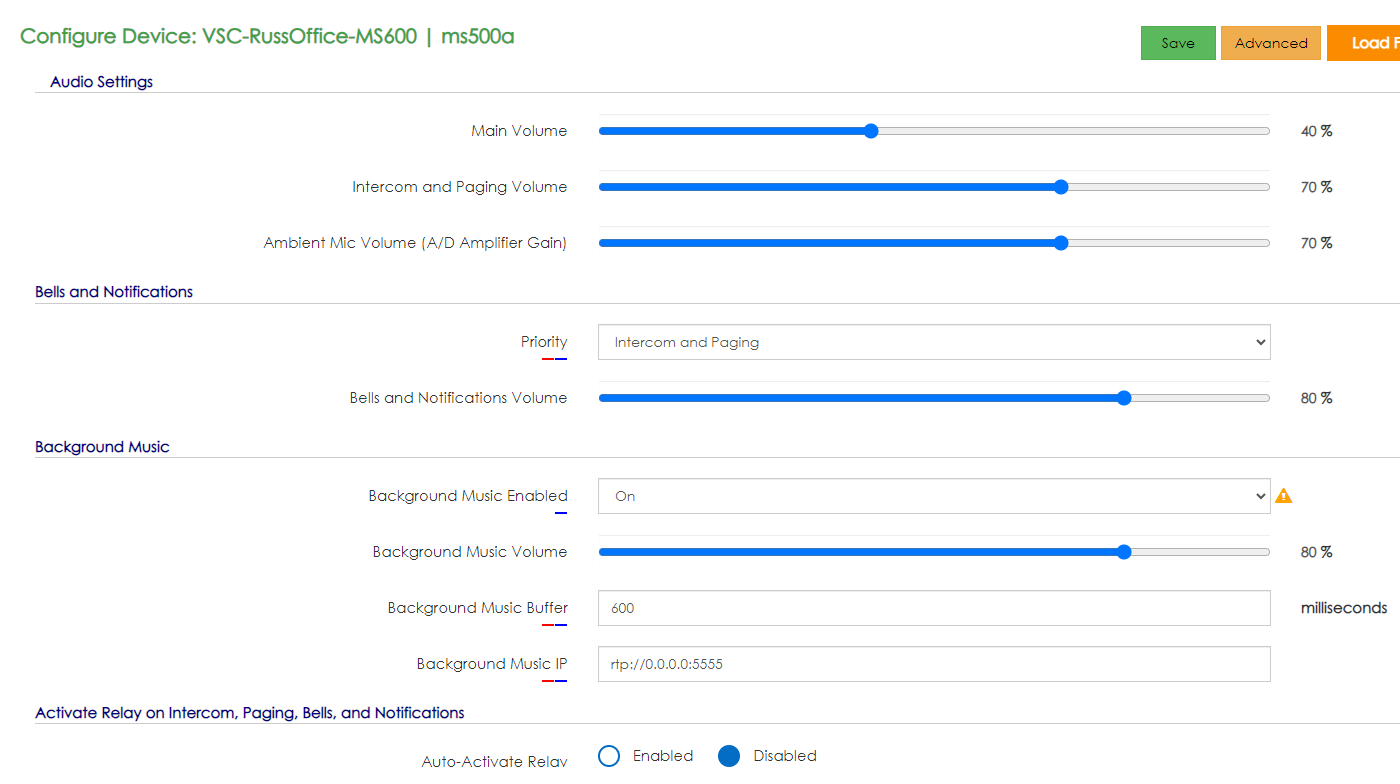
Now that you're on this menu, here's an explanation of volumes.
Main Volume - The overall volume of any output to the speakers, this should not exceed 80% unless in extreme circumstances.
Intercom and Paging Volume – there are separate volume controls in the devices This setting controls both intercom and paging (anything over SIP, think live active talking) volume Range is 0-100%, the default setting is 60
Microphone Gain – this controls the sensitivity of the microphone in the classroom The higher the value, the more sensitive the classroom ambient mic This may improve the ability of the office to hear the classroom.
Priority – this controls the priority of the system The EPIC System will give priority to either Bells and Notifications, or to Paging and Intercom This means that whichever is set as priority will override the other type of message in the event of a conflict By default, the priority is Bells and Notifications
Bells and Notifications Volume – this controls the volume of all Bells and Notifications received by the device It is a separate volume control from the paging and intercom The range is 0-100% with the default setting of 60%
Background Music Volume / Audio played from your front office CLAUDIA device – this is an independent volume control specifically for the background music that is received Range is 0-100% with the default set to 80% This is generally set higher than the other volumes so that the source streaming device (phone) has more control of the streaming volume
Background Music Buffer – similar to the buffers mentioned earlier, this stores the data from the network stream for a defined amount of time prior to playing on the device Because this is not live audio, the buffer is larger, set to a default of 600 milliseconds
Background Music IP – This is the IP address that the devices will listen to for the background network stream 0 0 0 0 means it will accept any stream to its port This can also be a multicast address or individual IP address to restrict to only specific sources The default IP is 0 0 0 0
Background Music Port – This is the port the devices will use to receive the background music stream It is used in conjunction with the IP to allow streaming from only certain sources The default port is 5555
With these volumes explained, the best course of action to fix our problem classrooms would be to raise the volumes of Main Volume and/or Intercom and Paging Volume.
After setting the new volumes and pushing the settings to all of the devices by click the green button at the top that says "Save and Push Settings" you should test the volumes to see if they are adequate.
Pro-Tip: Now knowing that the Main Volume, and Intercom and Paging Volume were set too low, it would be a good idea to test out the Bells and Notification Volumes as well, these volumes are how loud or quiet your notifications are like Lockdown, Severe Weather, etc.
Adjusting Volumes per Classroom
Another way to adjust volumes, but only for one classroom would be to follow similar instructions above but in the devices menu click on Edit Device Setting as shown by the red arrow below.
Note that if you adjust a volume here and then later perform a Configure Devices Save and Push that will set the volume to the new Save and Push setting unless you deselect the device from the Configure Devices Save and Push, but will you remember to do that every time? (No, so try to not adjust volumes per classroom this way)
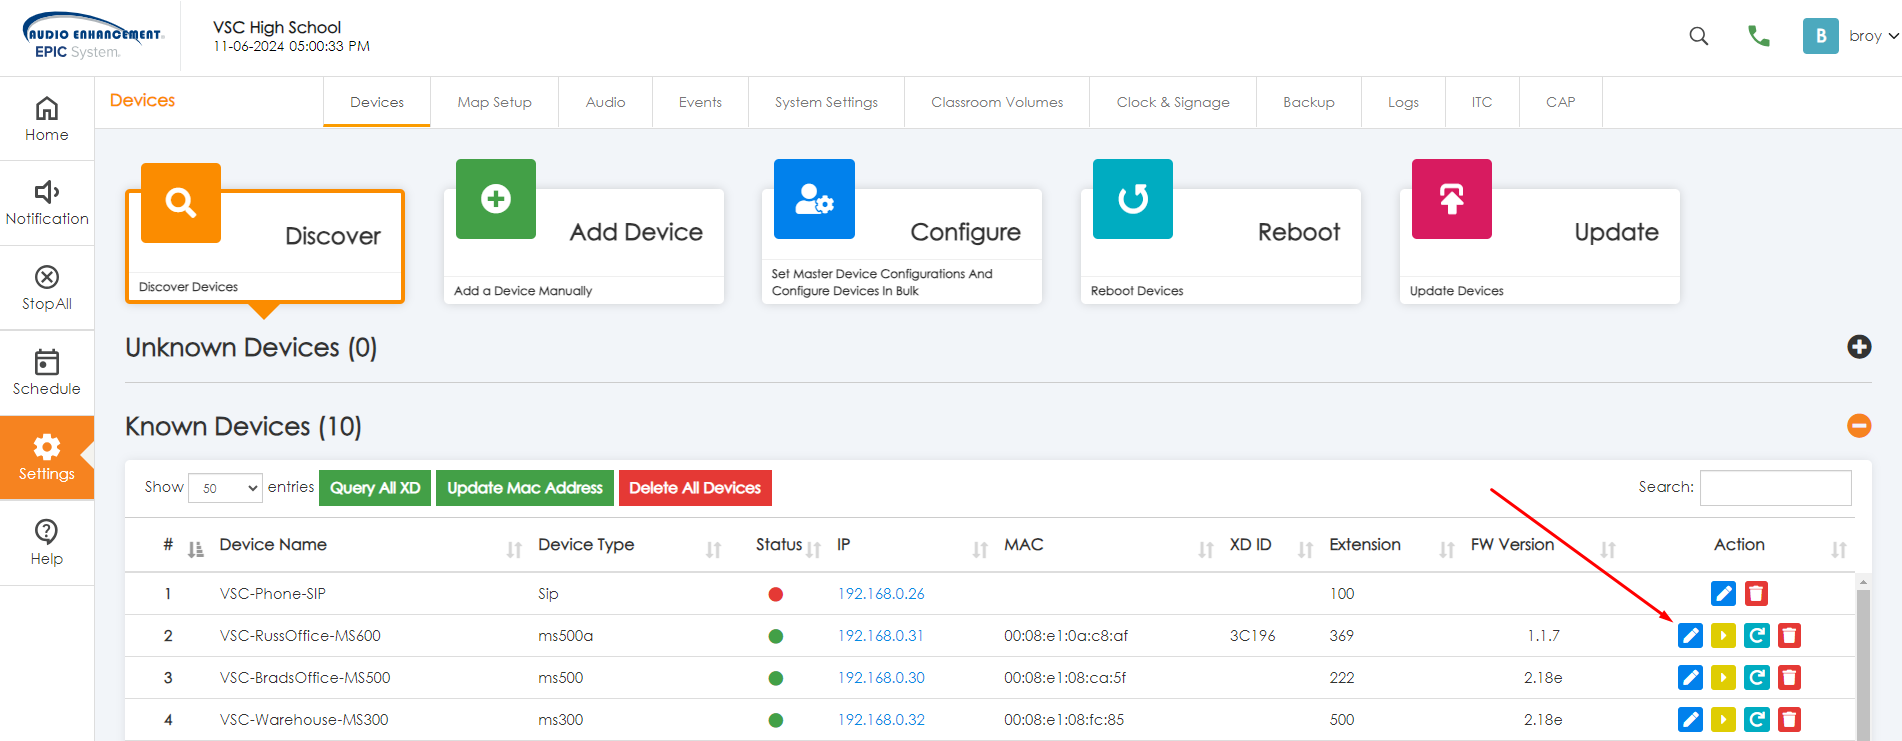
Once in the device editor, the volume adjustments look exactly the same as the Configure All Devices menu.
Adjusting Volumes on the Device
Another way to adjust volume per device that can not be undone by a Configure Setting Push and Save is to use the Classroom Volumes menu located in the top menu bar right after System Settings.
Once you open that menu you can select a specific device from the drop down.
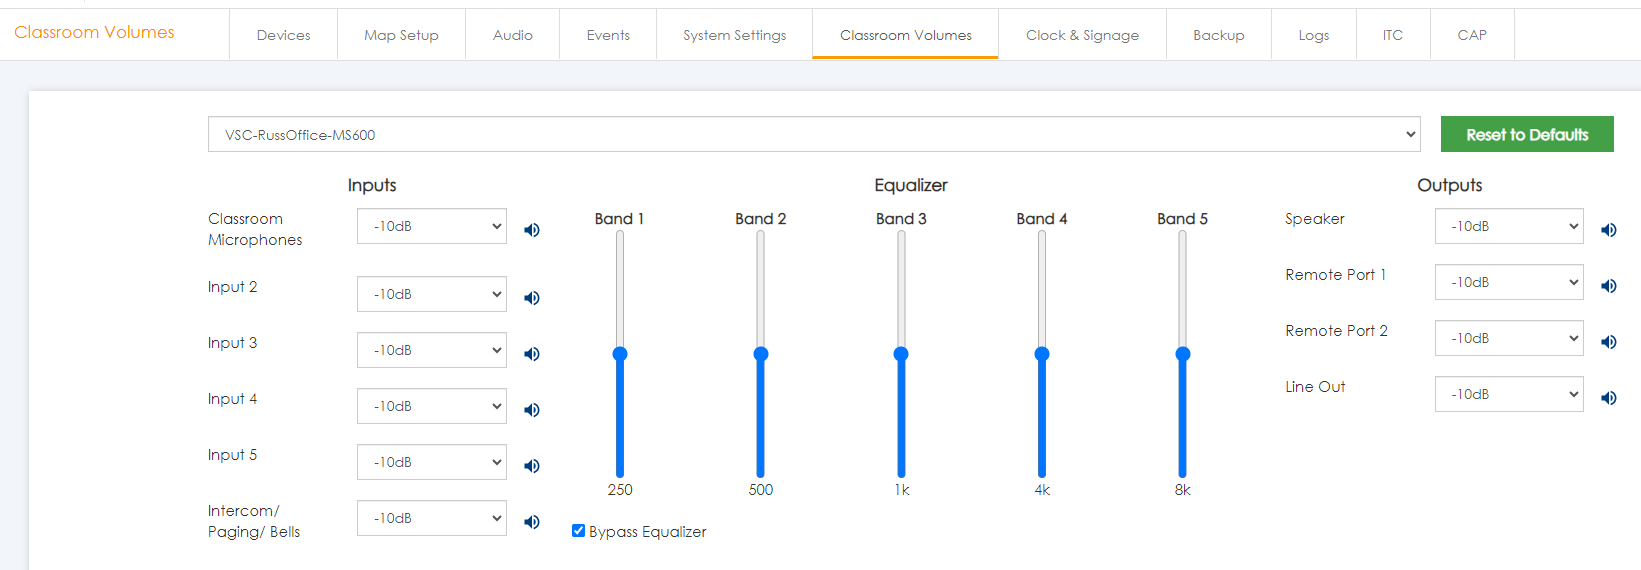
Most of these volume settings are self explanatory, but feel free to reach out if you're not comfortable adjusting these volumes.
Input 2-5 are the 3.5mm aux jacks on the device itself.
Remote Port 1 and 2 are reserved for Accessory Devices that plug into the RmCtrl1 and 2 RJ45 ports or phoenix connectors on older devices.
These adjustments are made live as you adjust them, a useful thing to do here for troubleshooting is to click on the speaker icon itself next to each input/output to mute/unmute that input/output.